
Introduction to GA4
What is GA4?
GA4 stands for the fourth generation of Google Analytics, which is the most widely used web traffic/website analytics tool globally. To delve deep into the basics and features of Web Analytics, one can refer to my previously written article titled “Detailed Basics of the Old GA (Google Analytics)“.
Since the launch of Google Analytics in 2005, Google has been committed to offering a more comprehensive and professional website analytics tool. GA4 is their latest endeavour, significantly different from the previous three versions. This article will attempt to explain the features of GA4 using simple examples, alongside providing a beginner’s guide to installing and basic setup of GA4.
Main Features and Advantages of GA4
The previous versions of Google Analytics (Universal Analytics, abbreviated as UA) primarily relied on the concept of “sessions” to track user activity on websites. GA4, however, fundamentally shifted this focus from sessions to events and user behaviour.
For instance:
Old UA: Suppose a user enters your website and performs the following actions: Views the homepage, clicks a blog article, navigates from the blog article to a product page, and then exits the website. In this scenario, UA would bundle these activities into one “session” and evaluate its impact through set objectives and conversions.
GA4: When the same user performs the same actions, GA4 perceives it as: “Homepage view” is an event. “Clicking a blog article” is another event. “Navigating to a product page” is a third event. Every user interaction is viewed as an individual event and can be individually set up and analysed. This means you can understand not just how users interact but can easily define and combine events to gain insights that truly matter to you. For instance, if you wish to know how many users clicked on a product page right after reading a blog article, GA4 can provide intuitive insights into this specific user journey without the complicated setups or merging of multiple reports from the old times.
Differences between Old GA and GA4
There are numerous functional and technical differences between GA3 and GA4, but to put it briefly for the fast-paced Hongkongers:
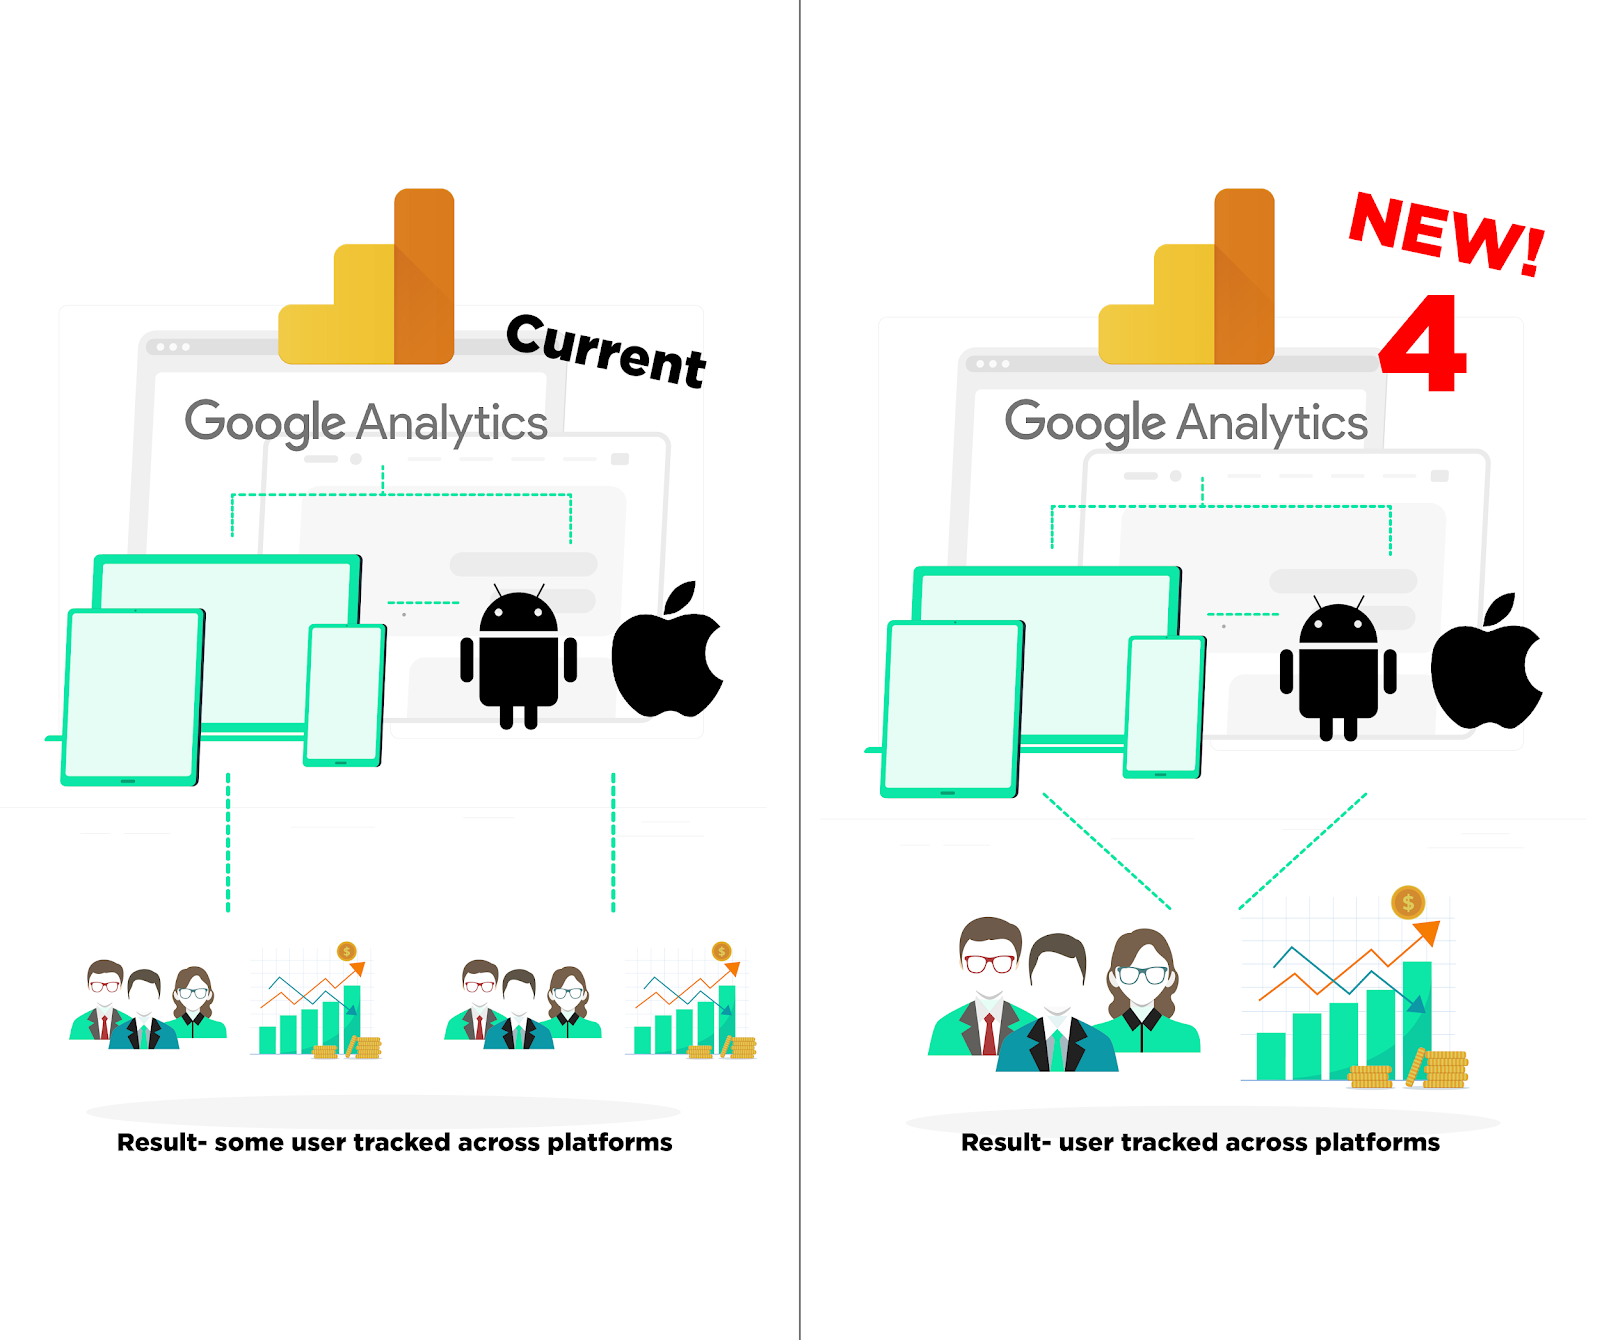
1. Cross-Device Tracking
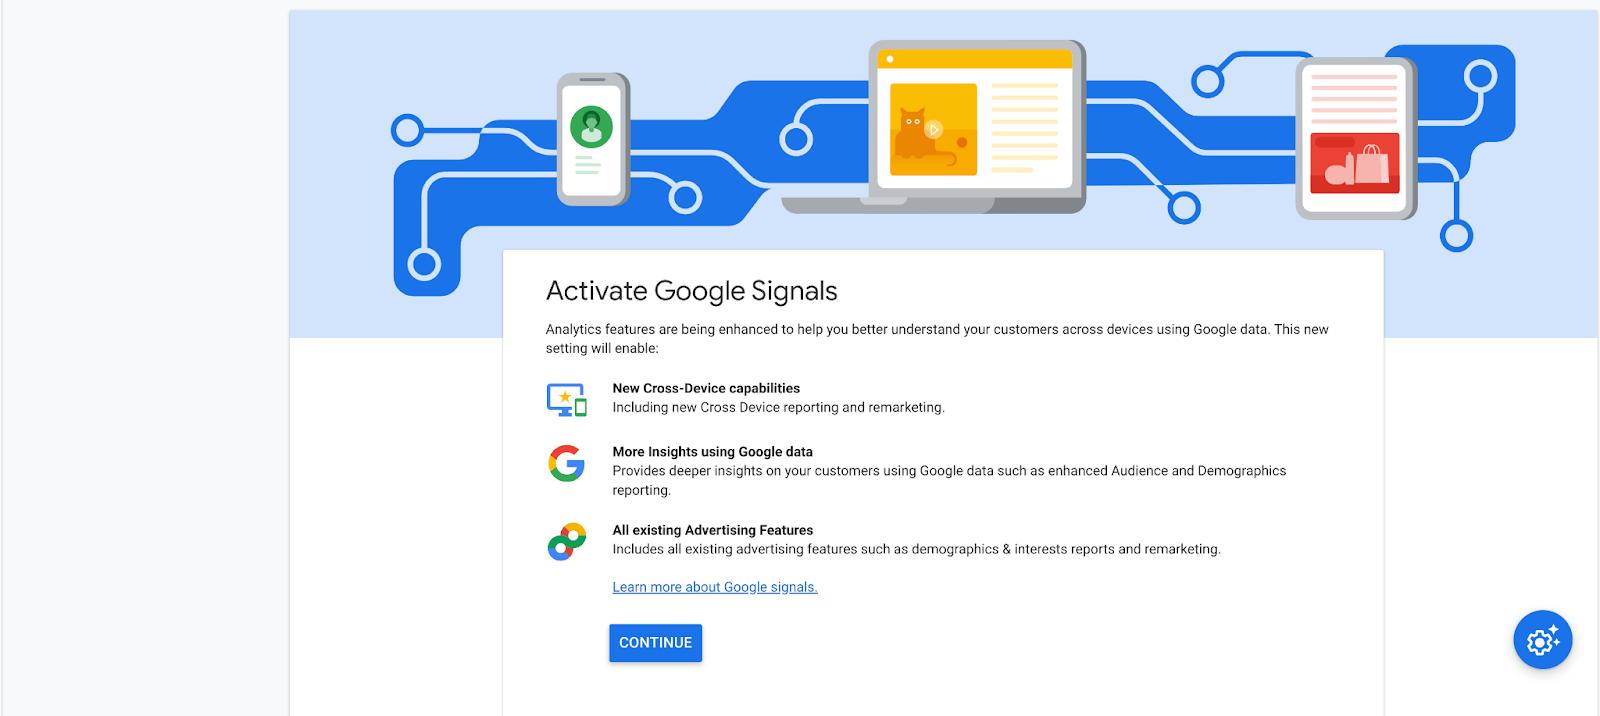
In GA4, this refers to tracking a user’s activity across multiple devices such as desktops, mobiles, and tablets. GA4 utilises ‘User ID’ and ‘Google Signals’ to identify and merge the activities of a single user across various devices. This provides analysts with a more complete and continuous view of the user’s journey, rather than viewing the user’s behaviour on different devices as separate interactions.
2. Session/PageView-Based Vs Event-Based
Old GA: It revolves mainly around “sessions” and “page views” to track and analyze user behavior. Imagine visiting an online bookstore. From the moment you enter, view various books, and decide to exit, the entire process is viewed as one “session”.
GA4: It tracks every single “event” a user performs on a website. Not just page views but every form of interaction can be defined as an event and tracked. Using the same online bookstore example: scrolling on the homepage, clicking a particular book, checking reviews, or adding a book to the cart, each action can be defined as an “event” and tracked individually.
3. Depth and Flexibility in Analysis
Due to its event-based nature, GA4 offers deeper and more flexible data analysis. Analysts can more easily define the events they want to track and delve deep into the specific behaviours users exhibit on a website.
Old GA: You might primarily focus on page views, like how many times a recipe was viewed. But it doesn’t tell you the actual interest users have in the recipe or their subsequent actions.
GA4: Users’ actions like searching, clicking on a recipe, scrolling to see ingredients, watching a tutorial video, or saving a recipe for future reference are all defined as specific events. For example, if users search for “low-sugar desserts”, click on a specific recipe, scroll to see ingredients, and finally save or share it with friends, you get a full insight into their interaction flow. This not only reveals the most popular recipes but lets you understand how users interact with and utilise these recipes.
4. New Engagement Metrics for More Accurate Tracking
Old GA: It heavily relied on “bounce rate” to gauge user engagement. However, If a player enters a platform, browses through five games, spending about 8 seconds on each, and then exits, the traditional “bounce rate” would record this player as having no “meaningful” activity and count it as a “bounce”
GA4: Using the Same Example as above. Under GA4’s engagement metrics, since the player spent a total of 40 seconds on the platform, a more accurate measure of engagement is provided. Such detailed tracking allows you to better understand how players interact with your platform. Better Insight Indeed!
This detailed tracking allows you to have a more accurate understanding of how players interact with your platform. From this, you can learn that perhaps players need more time to decide which game they want to play, or that your platform needs to provide better game recommendations to increase player engagement.
GA4 Setup Tutorial
Transitioning from GA3 to GA4
Before upgrading to GA4, you should have GA3 Property and Google Tag Manager. If you’re unfamiliar with Google Tag Manager and its installation process, refer to our article titled “Google Tracking Code Manager (GTM) Tutorial – Understand the 4 Major Elements for Quick Mastery”.
Follow the steps outlined for the entire setup process,
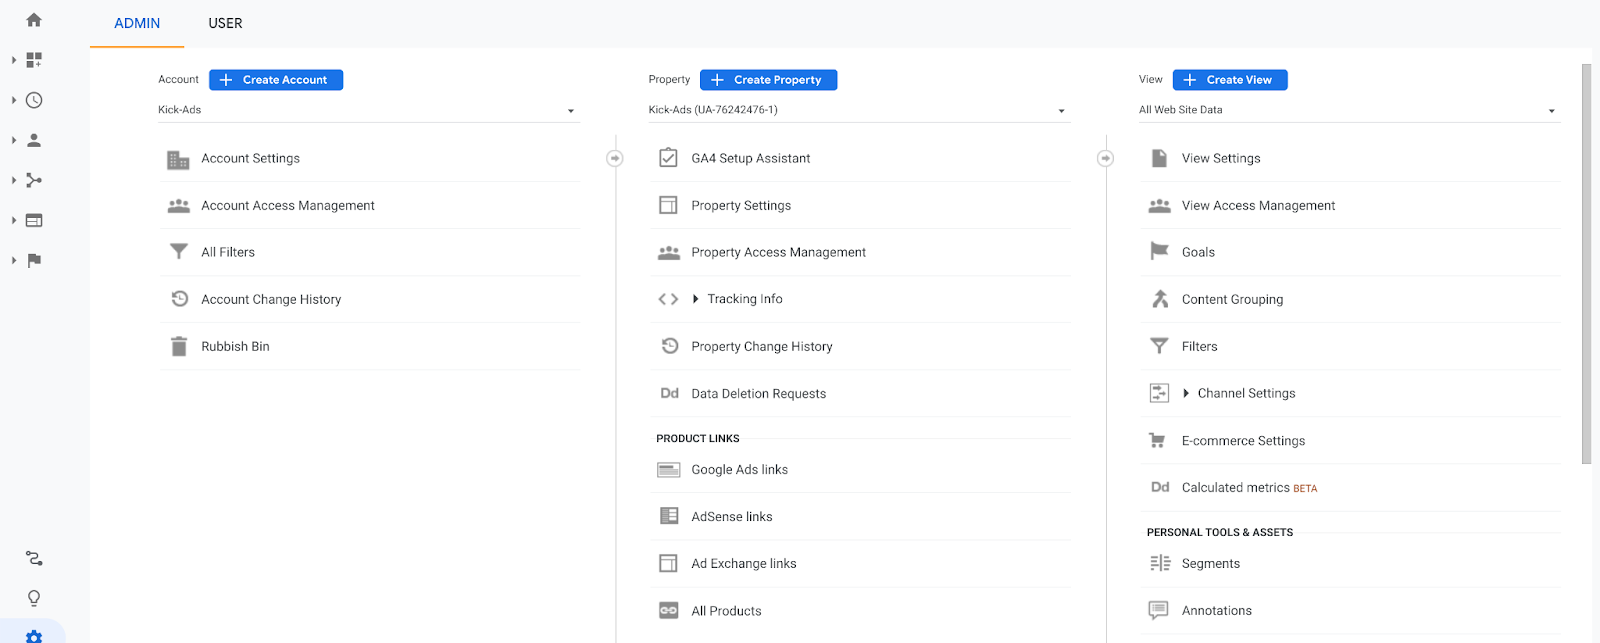
Step 1: Navigate to the “Admin” section, choose “Upgrade to GA4/ GA4 Setup Assistant”
Step 2: Get Started
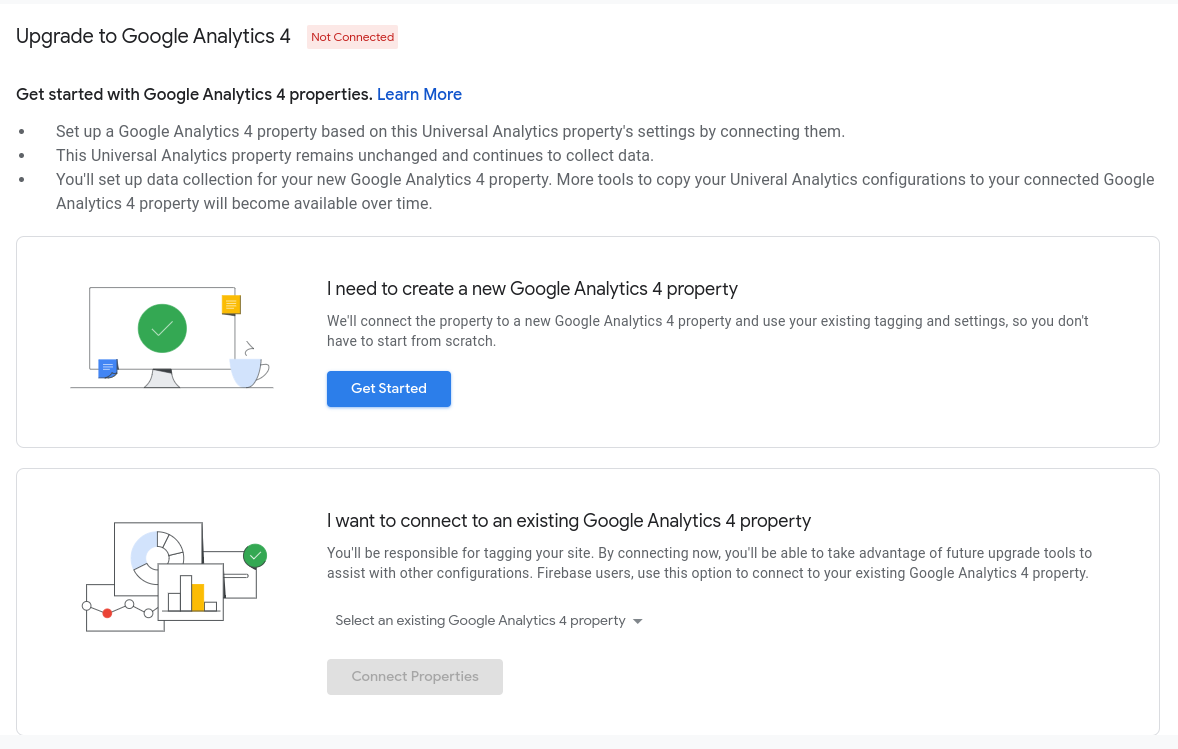
Step 3: Create a property
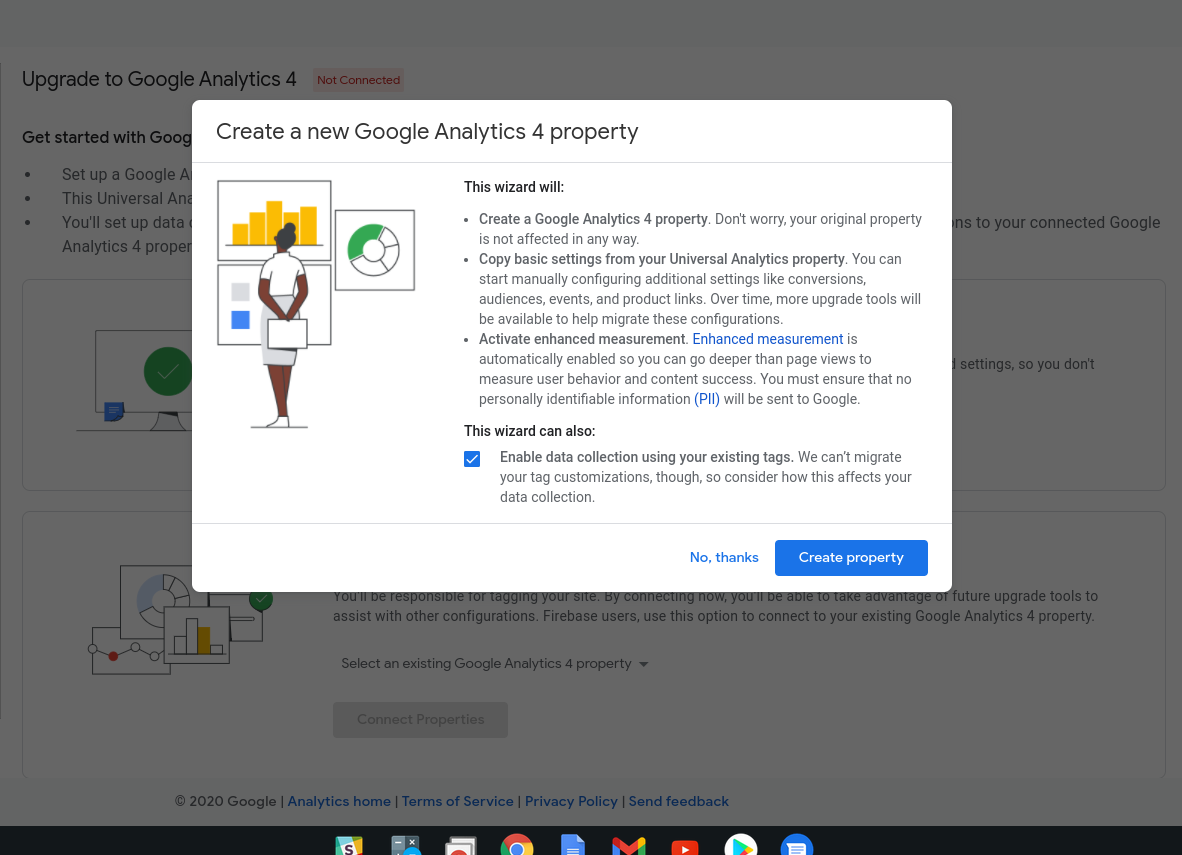
Step 4: “Choose ‘See your GA4 Property’. Google Analytics will now automatically create a new GA4 Property. This new Property will open in a new tab in the browser.”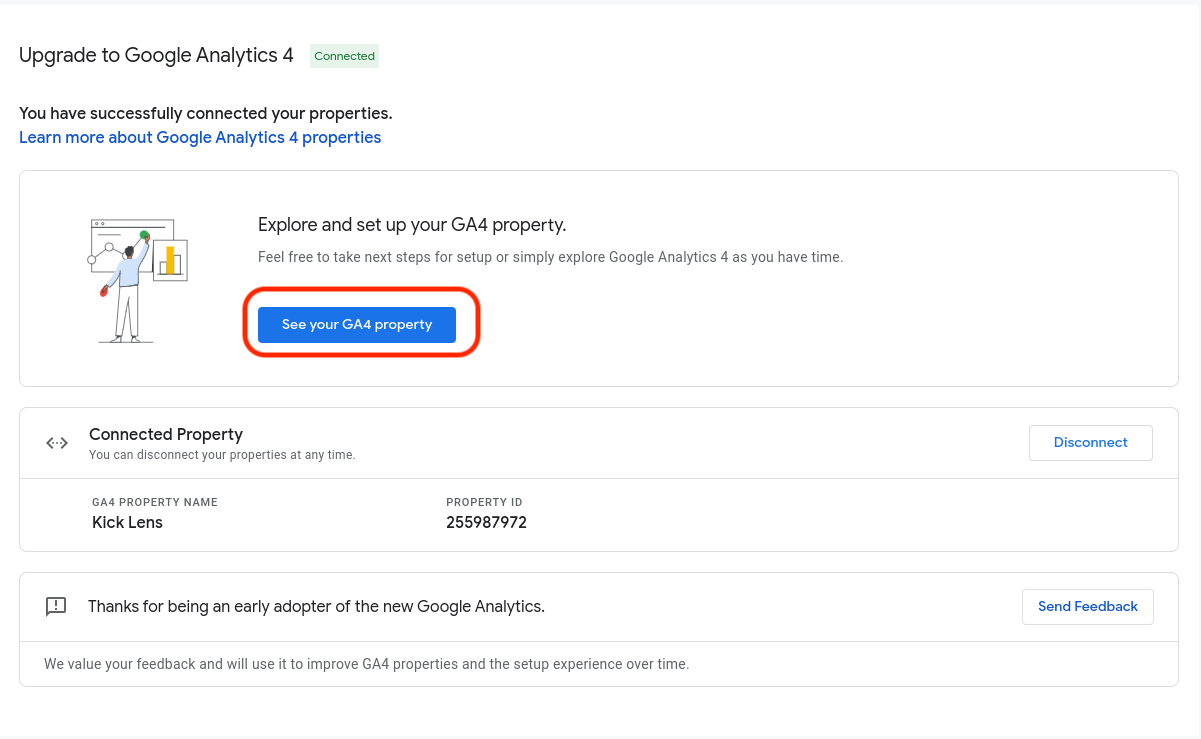
Google Analytics will now automatically create new GA4 Property. This new property will open up in a different tab and you will be automatically redirected to it.
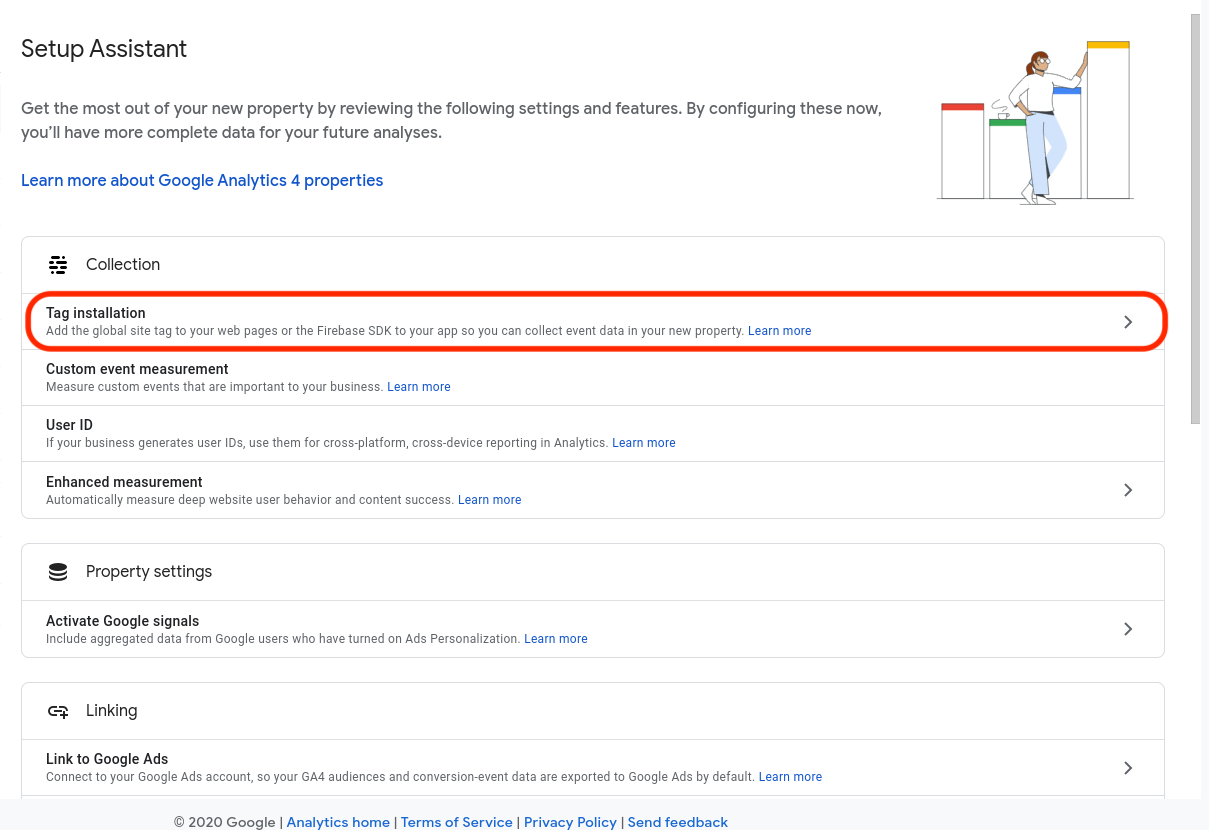
Step 5: Select “Tag Installation”
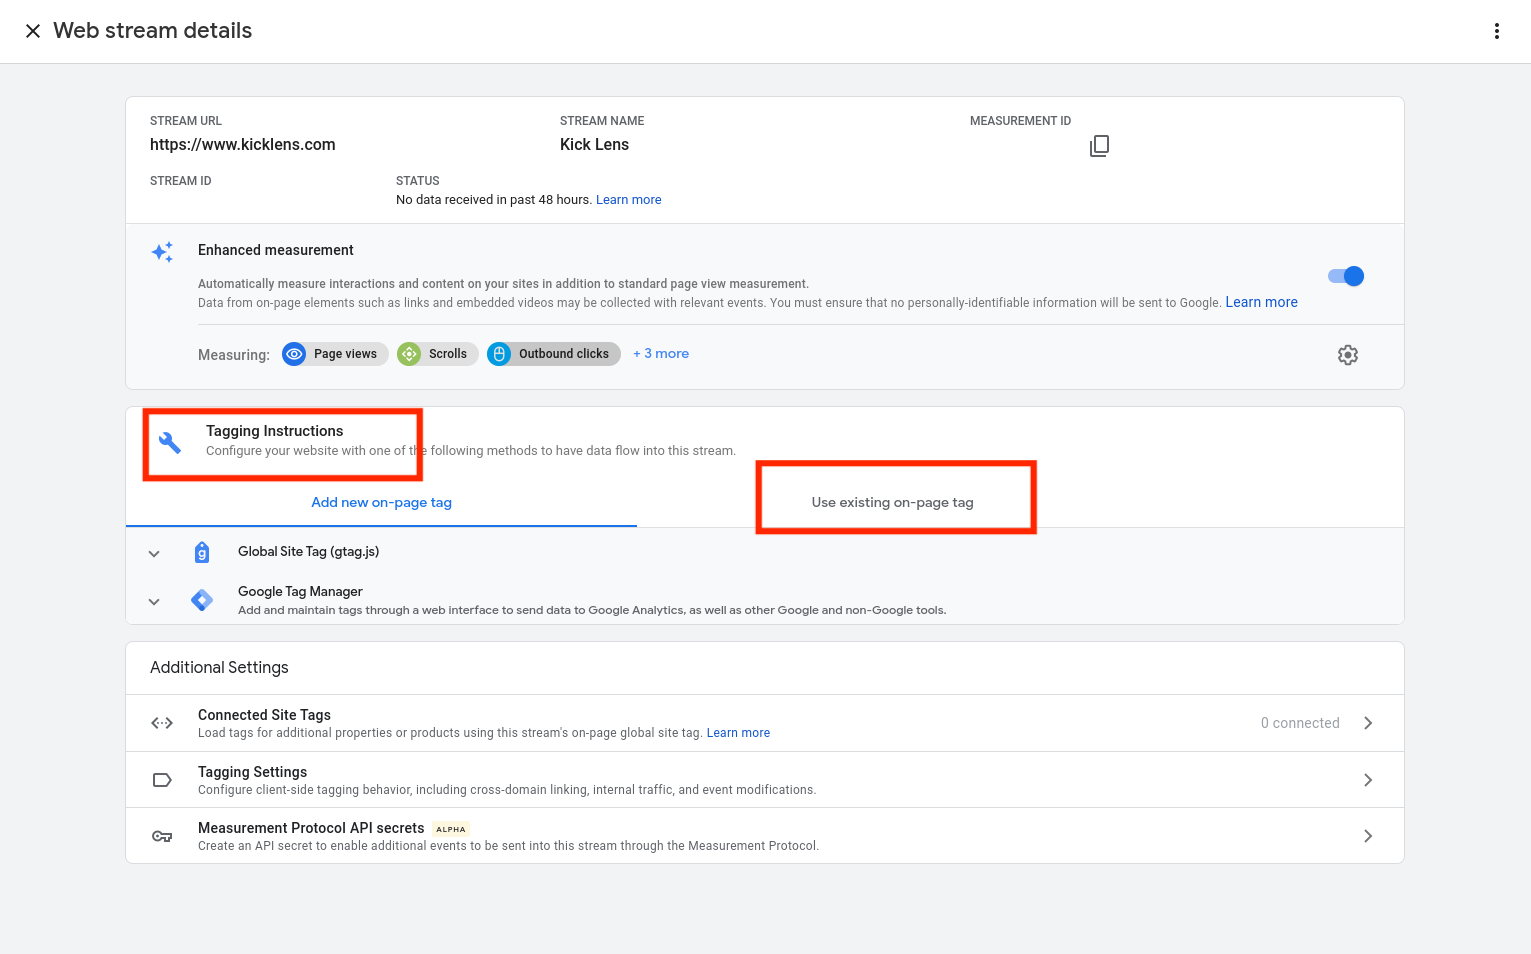
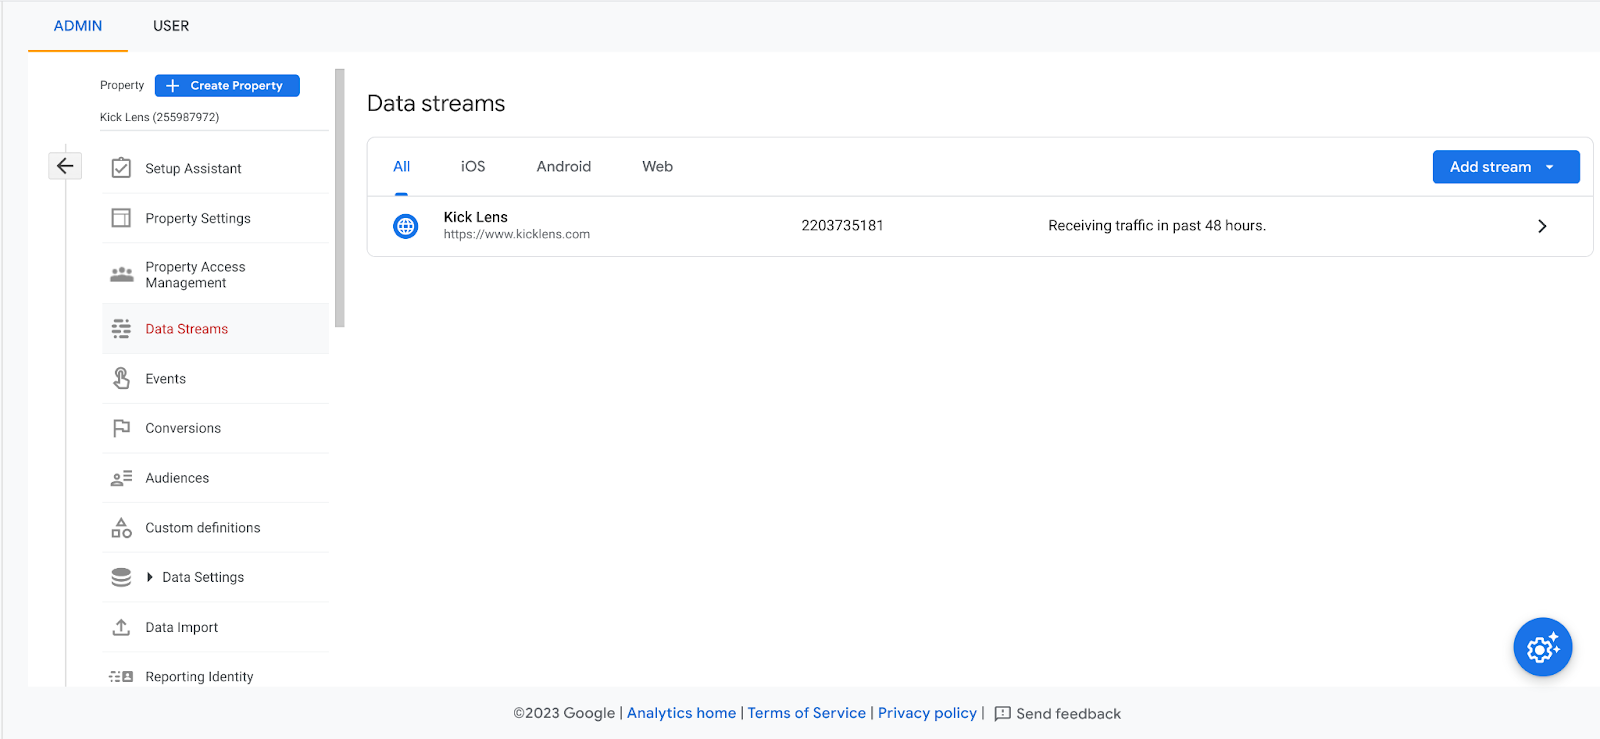
Step 6: Click on your Web Data Stream 
Step 7: Select “Use Existing on-page Tag” under the “Tagging Instructions”
Step 8: Click on the Google Tag Manager dropdown menu, and copy the GA4 Measurement ID for installation within the GTM’s GA4 Configuration Tag
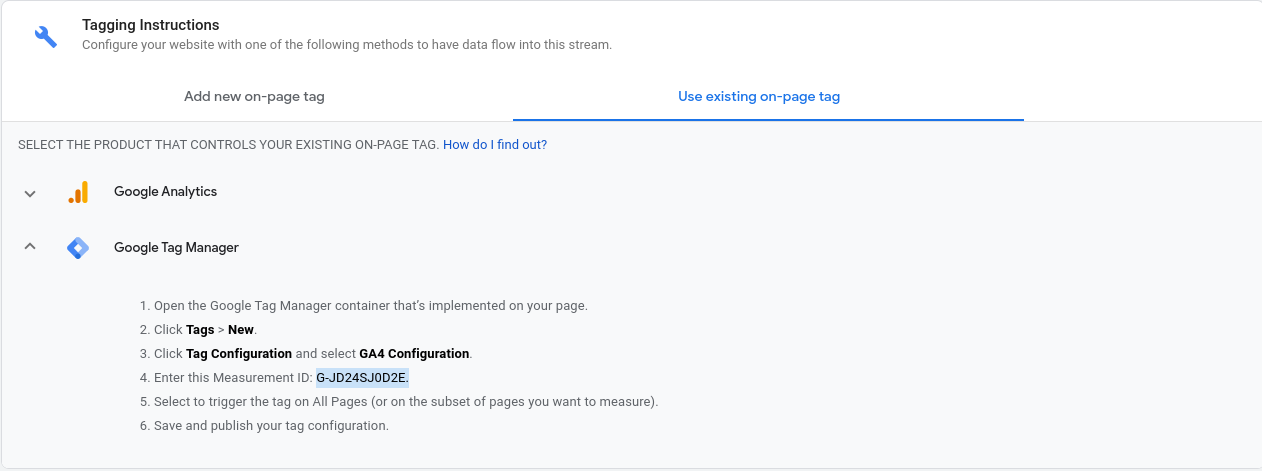
For the Google Analytics Side, the Setup is done. So now you need to navigate to Google Tag Manager.
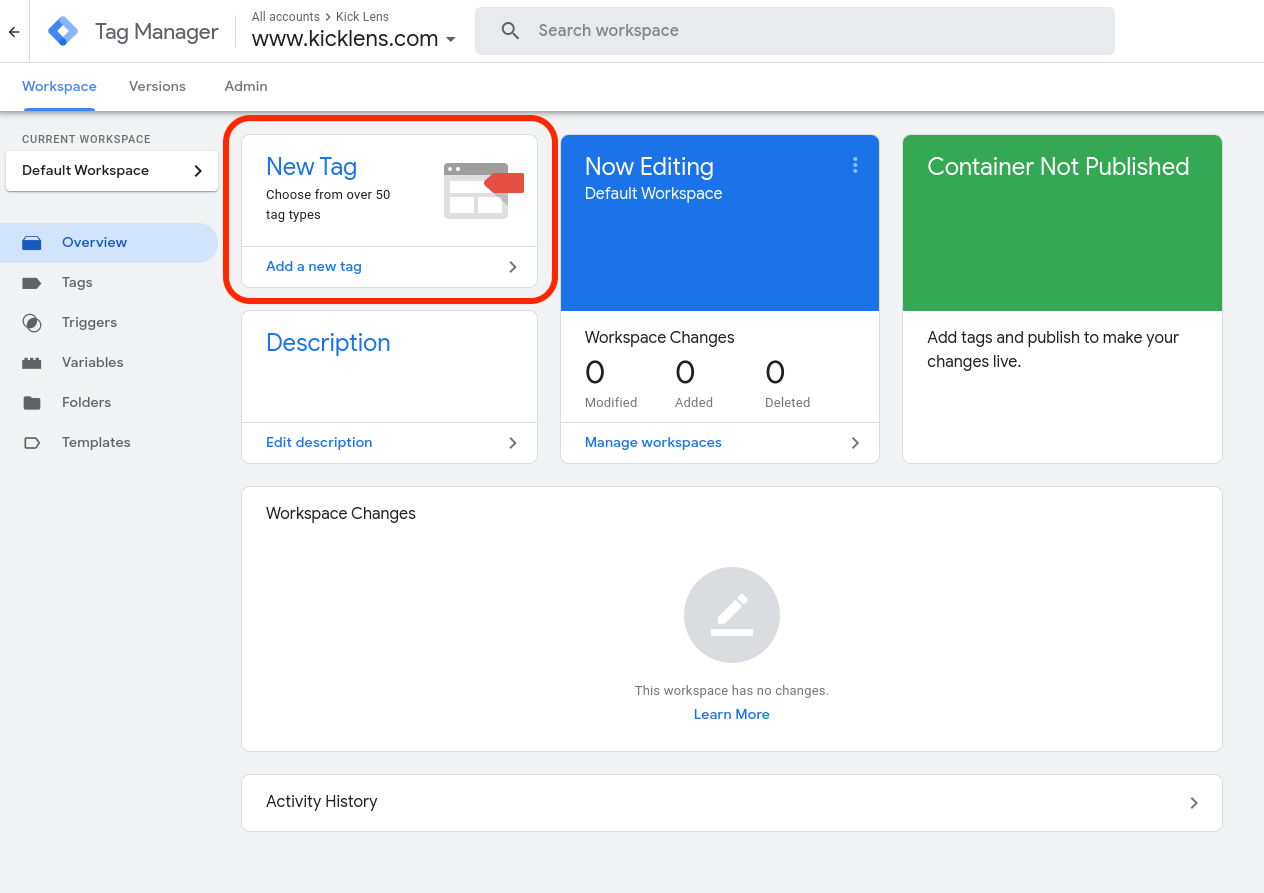
Step 1: Add a New Tag
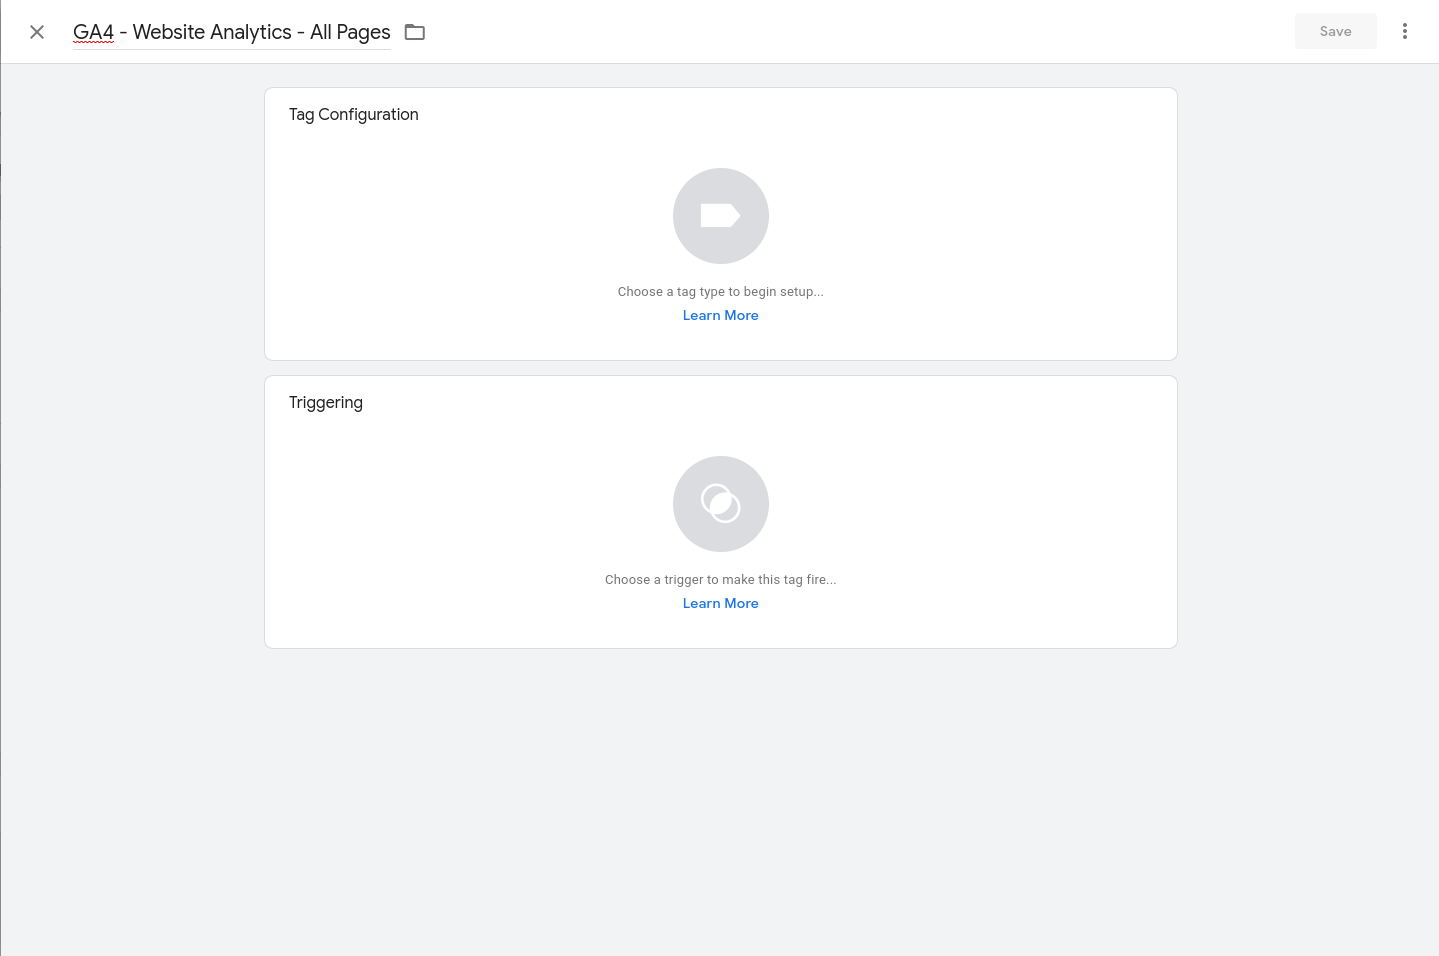
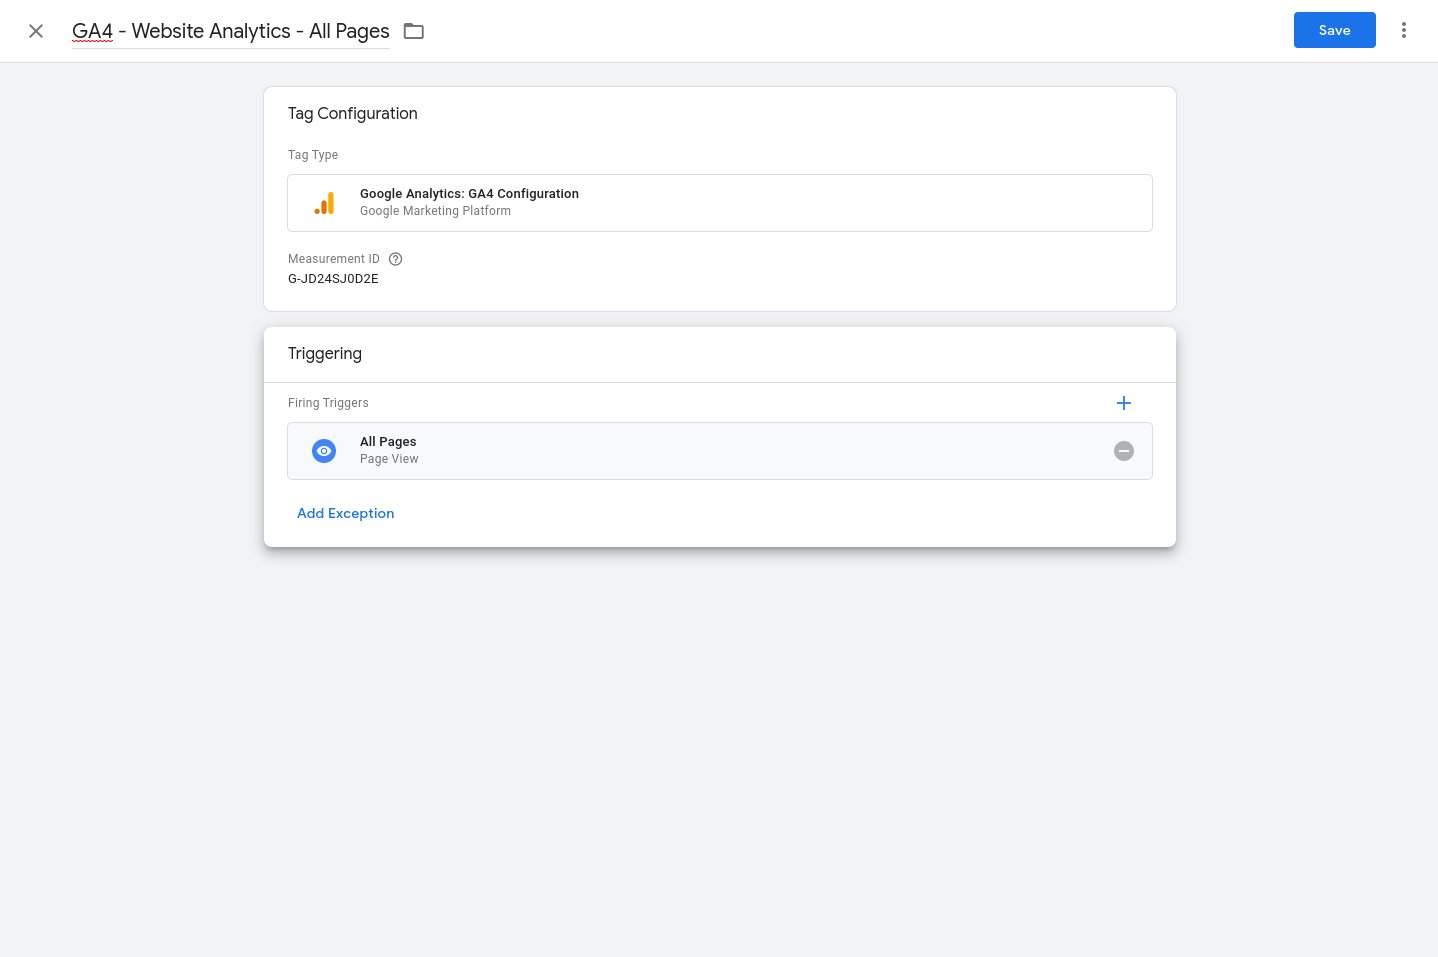
Step 2: Name this tag as “GA4 – Website Analytics’ All Page (Name Whatever you want as long as you can classify different tags easily)
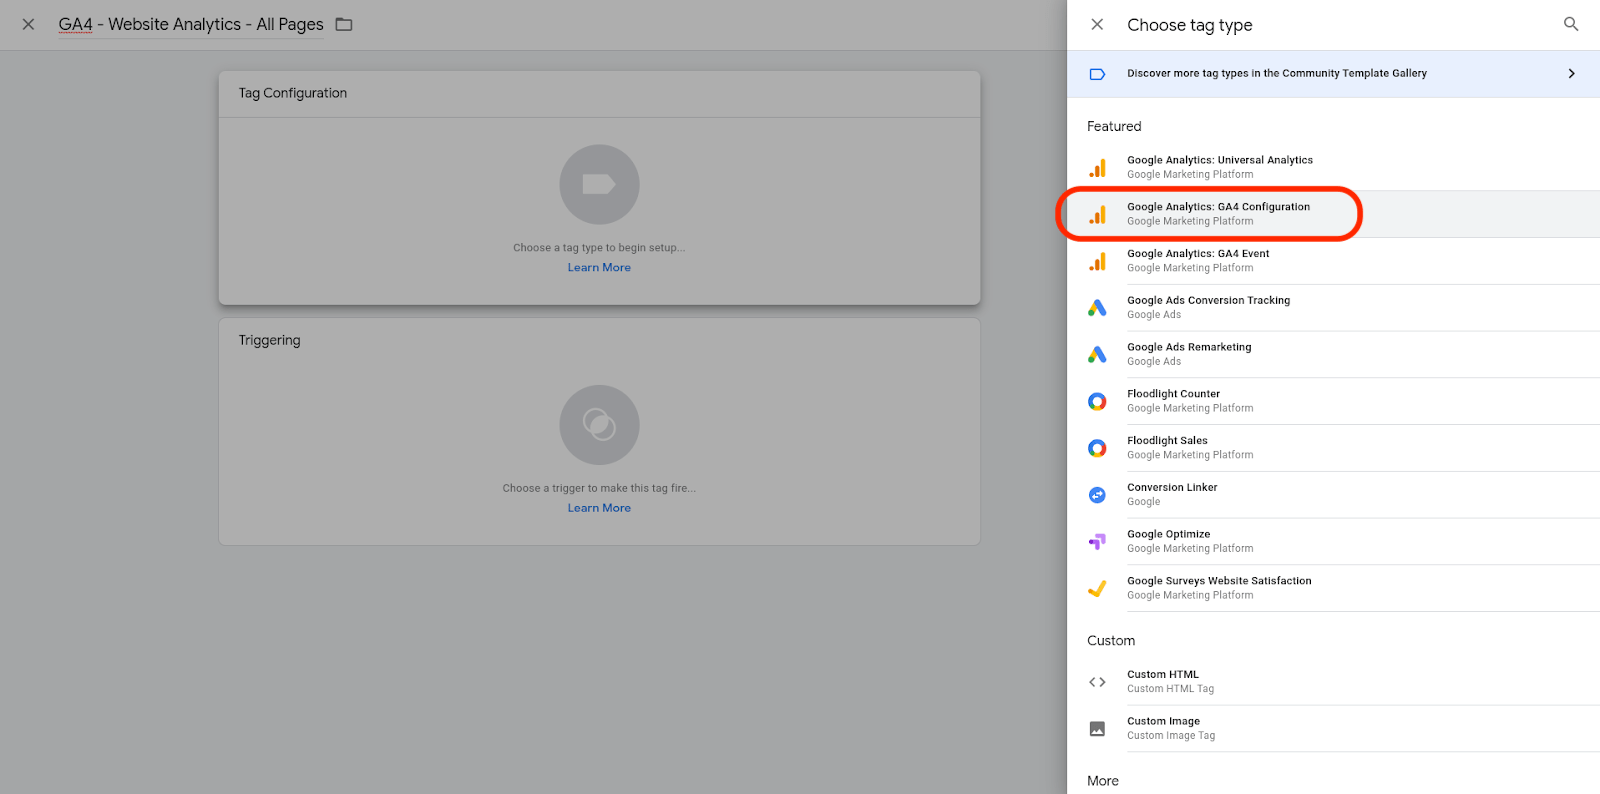
Step 3: Choose Google Analytics ”GA4 Configuration“
Step 4: Enter the Measurement ID 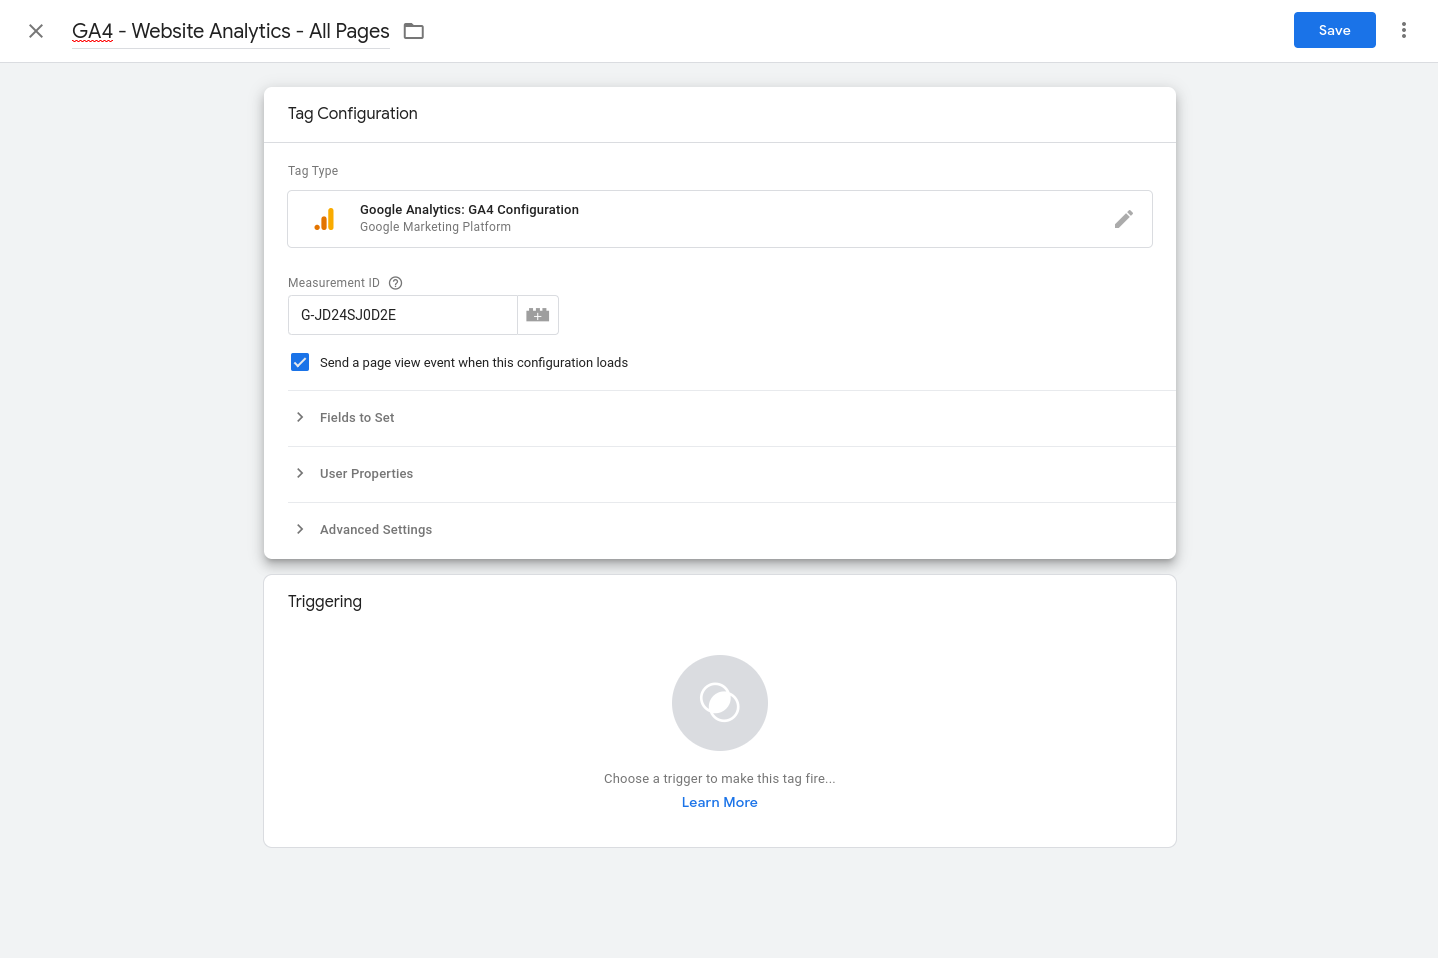
Step 5: Set your Trigger to fire on all pages and Click on “Save”
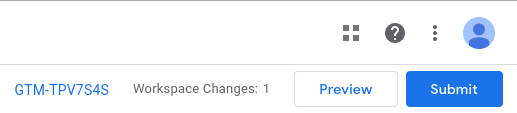
Step 6: In the real scenario, you need to preview and make sure the tag is fired correctly before you submit. But for simple demonstration, I direct press “Submit” then “Publish”
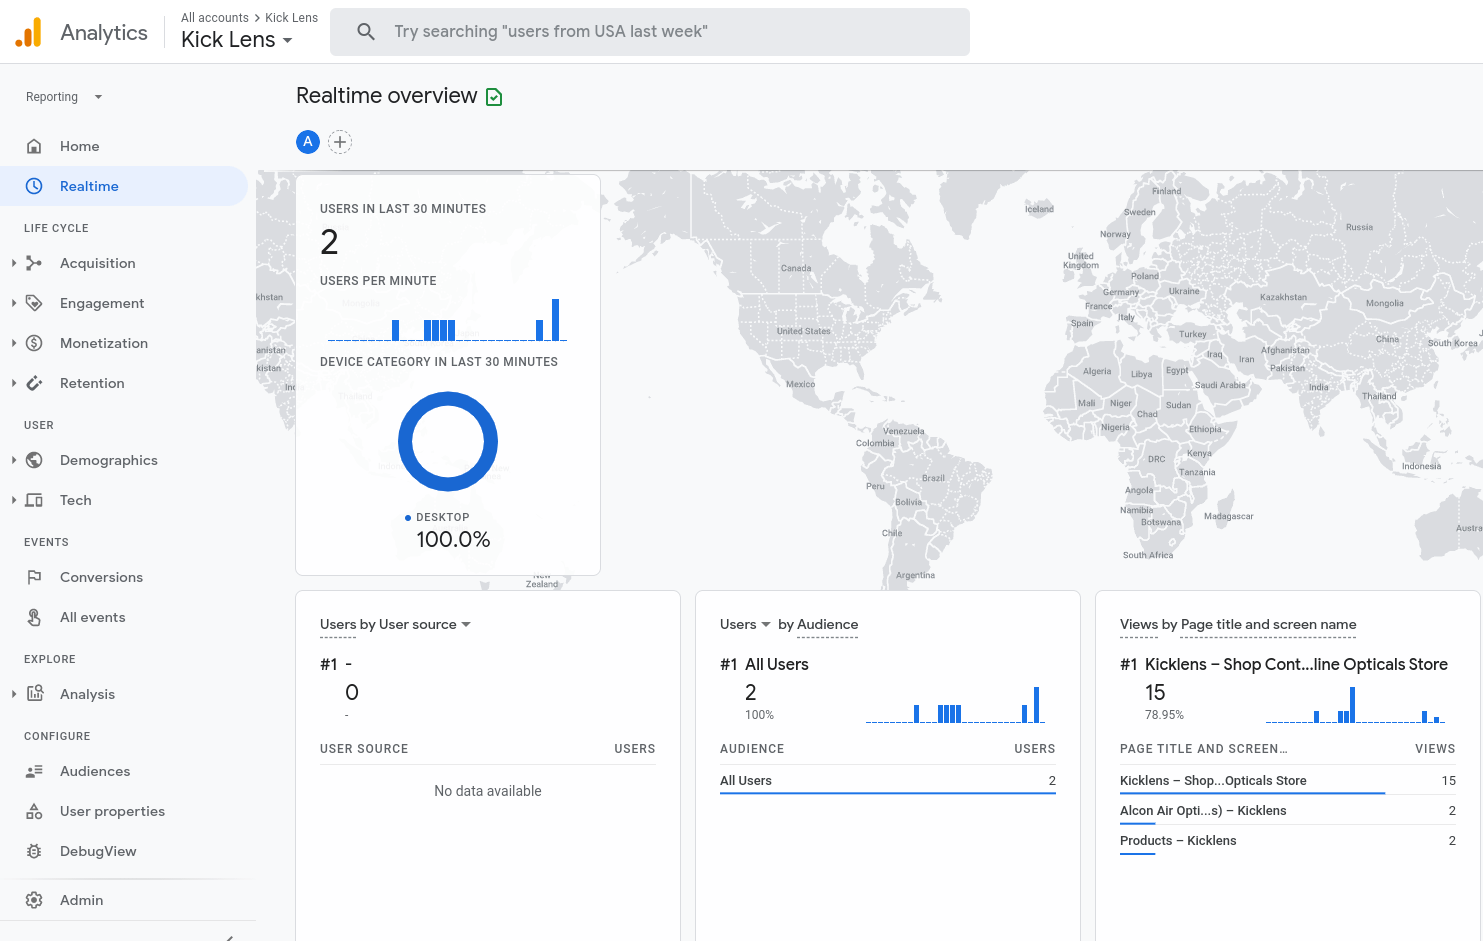
Step 7: Go to your GA4, if you see data in the Realtime tab, you should get it done!
Setup Check List after successfully installing GA4:
1. GA4’s Integration with Other Google Products
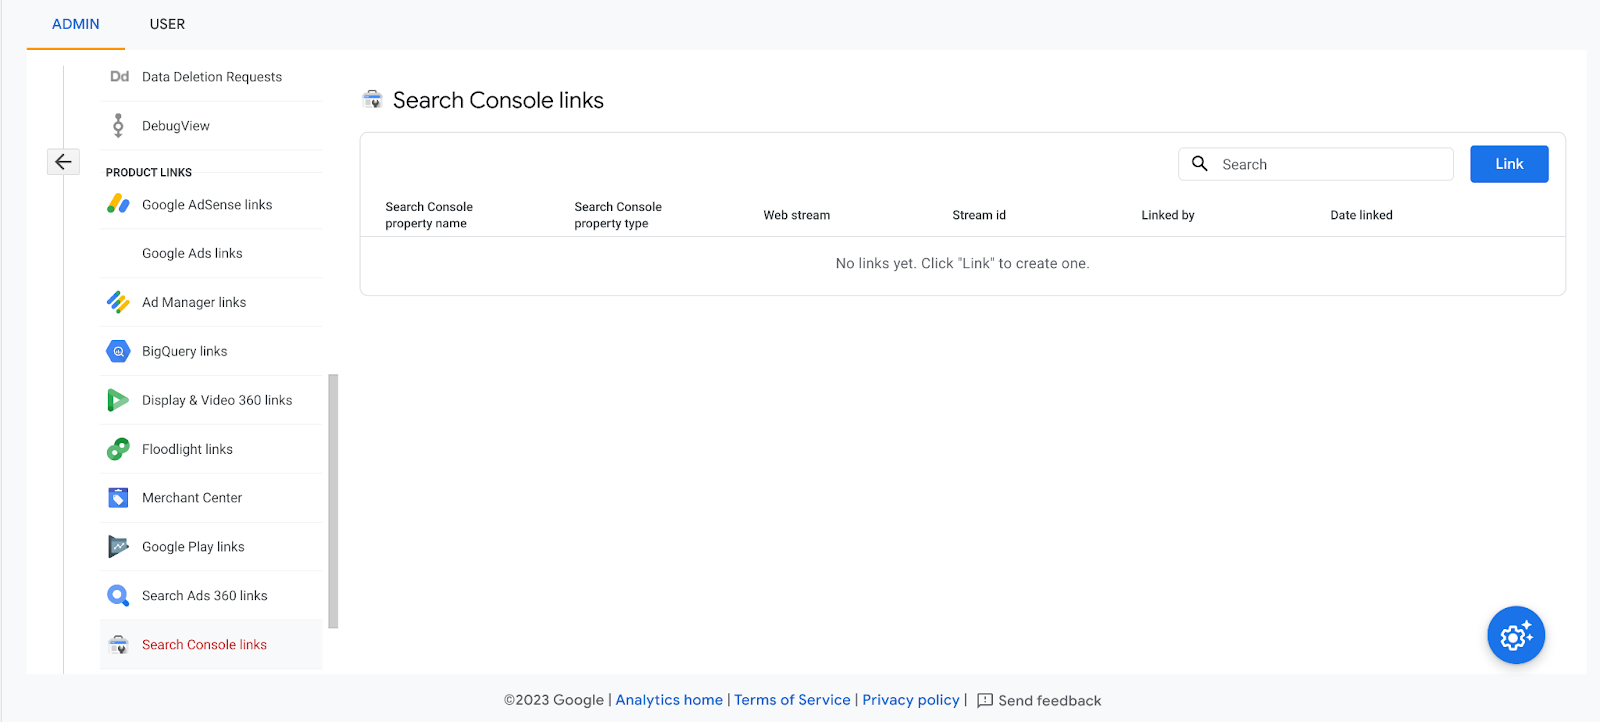
The integration of GA4 (Google Analytics 4) with other Google products is very convenient. For general websites, it is highly recommended to integrate Google Ads and Google Search Console (SEO) with your GA4 account.
Google Search Console Link Up
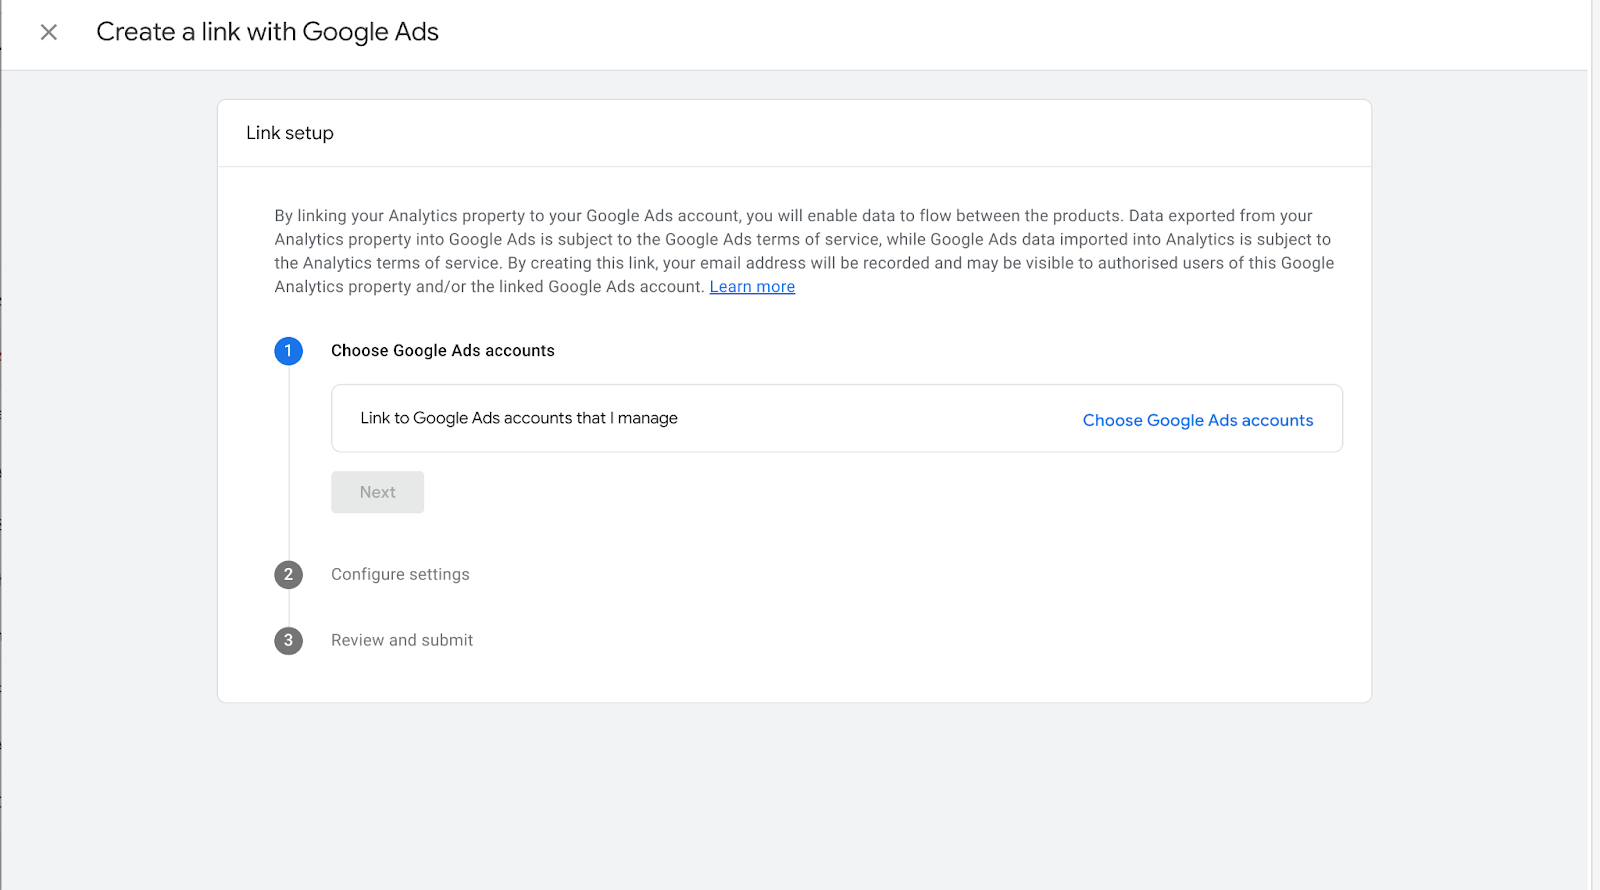
Google Ads Link Up
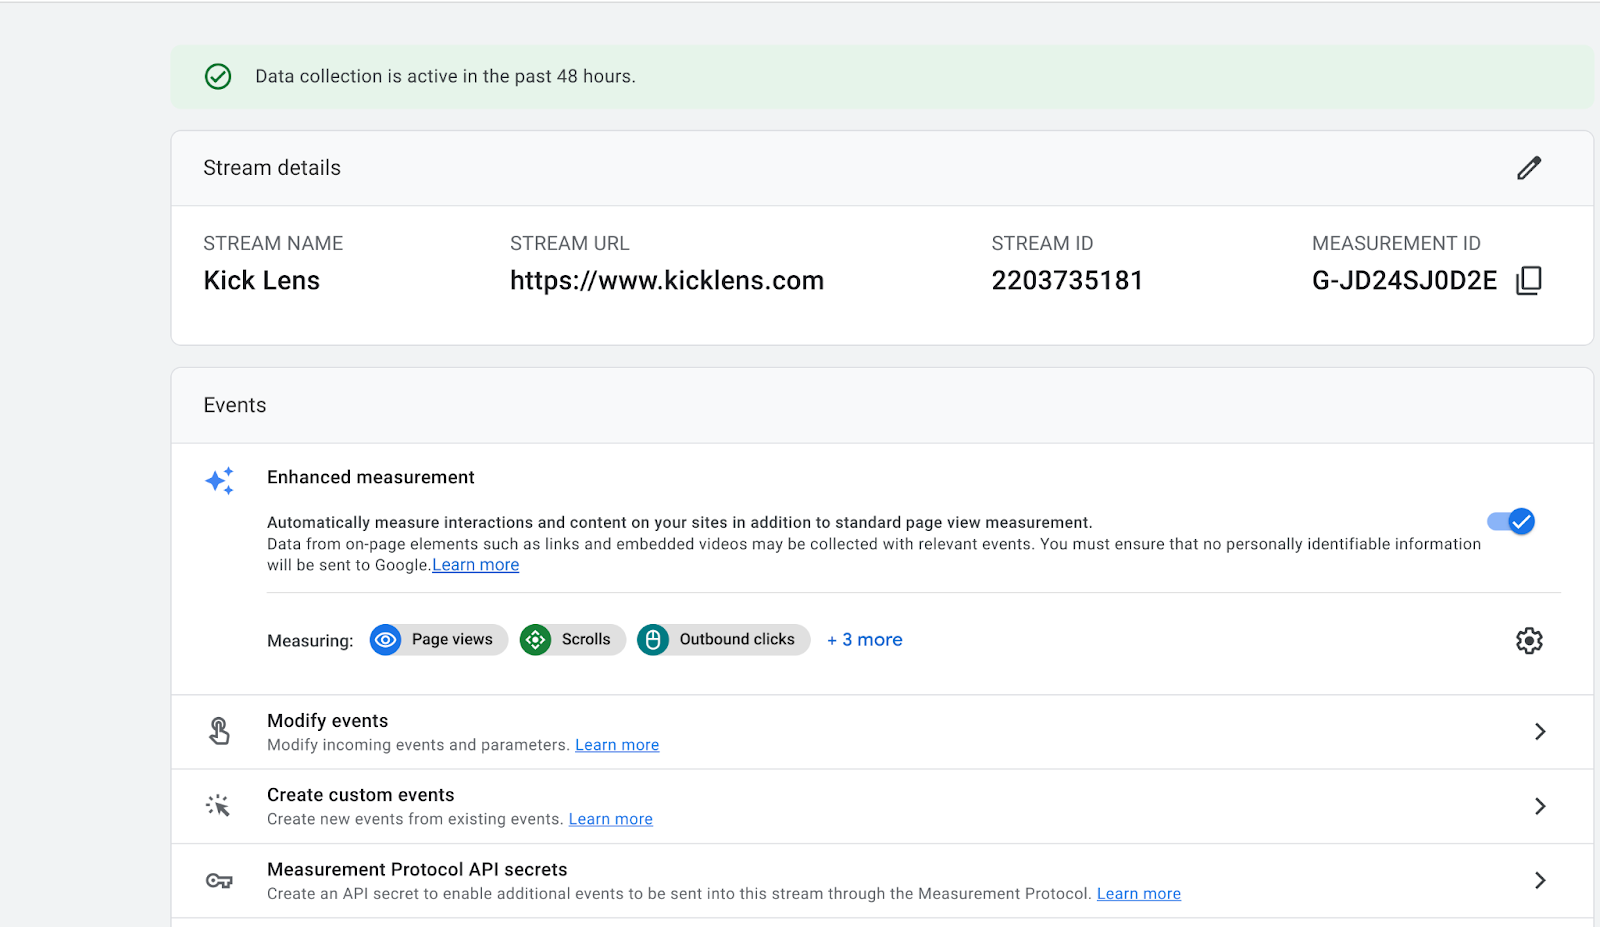
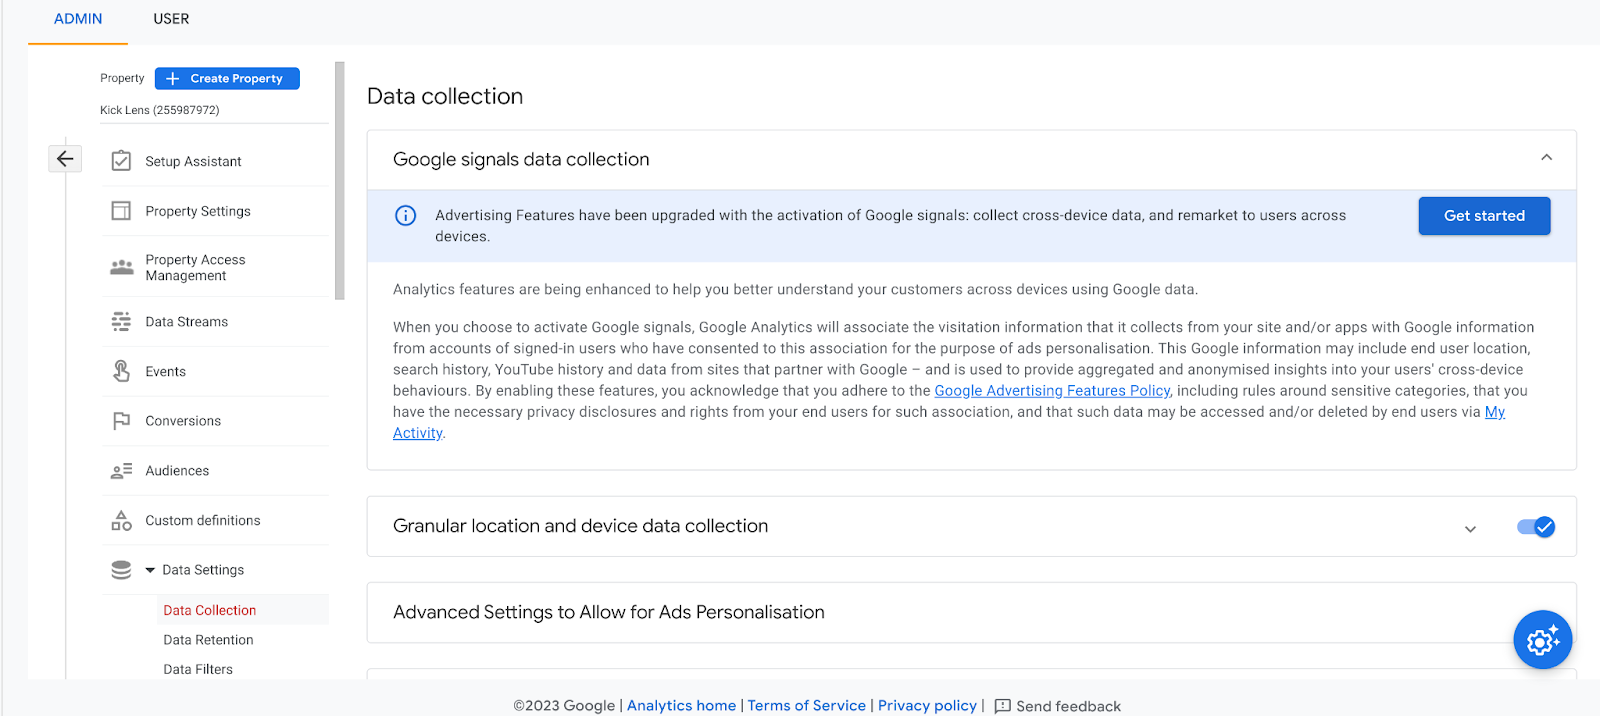
Activating Enhancement Measurement Tracking and Google Signal
2. Setting Up GA4 Event and Conversion:
There are three main types of events in GA4
(i) Automatically collected events
Automatically collected events are triggered by basic interactions with your app and/or site (as indicated under the event name in the table below). As long as you use the Google Analytics for Firebase SDK or gtag.js, you don’t need to write any additional code to collect these events.
(ii) Enhanced Measurement events
Do you remember? In the previous step, we already enabled the ‘Enhancement Measurement Tracking’. Once activated, it will automatically track the following events:
- Scroll (event name: scroll)
- Outbound link click (event name: click with the parameter outbound: true)
- Site search (event name: view_search_results)
- Youtube Video Engagement (events: video_start, video_progress, video_complete)
- File Download (event name: file_download)
- Page view (event name: page_view)
(iii) Recommended Event
You can also set up custom event tracking based on different industries for data analysis. For various industries, Google also offers Recommended Events. In another blog post of mine, I’ve provided a detailed demonstration of the most commonly used event configurations. If you’re interested, you can refer to the article titled “Everything you need to know about event tracking”.
After a successful setup, you can view the events you’ve established under the Event settings in GA4. If you deem a particular event as a conversion for your website, you can simply mark that event as ‘Mark as conversion’. However, please note that once an event is set up successfully, it might take 24-48 hours to reflect on subsequent pages. Thus, a bit of patience is appreciated.

This article provides a detailed introduction to Google Analytics 4 (GA4), Google’s latest web analytics tool. Compared to its predecessor, GA4 offers event-centric analytics, giving users a more realistic view of interactions and behaviours on a website. The article also offers a step-by-step guide on transitioning from the old version to GA4 and some advanced setting techniques. In essence, GA4 is a powerful tool, and through this tutorial, you’ll be better equipped to use it to optimize your website and business.
Ready to grow with Google Ads?
KickAds is a certified Google Partner agency in Hong Kong. We manage paid media for HK & Malaysia SMBs — data-driven, ROI-focused.


