Before diving in, I recommend reading my article on GA4 Guide first. With a solid understanding of GA4, you’ll find this article much more helpful.
As mentioned in my previous GA4 article, GA4 is a web tracking tool that focuses more on Event-Based tracking. This is different from the traditional focus on page views. GA4 pays more attention to tracking specific and meaningful actions, or ‘events’, that visitors take on your website.
This article will guide you on how to use GA4 and GTM to track all the interactions visitors have on your website. From basics to advanced, we’ll step by step reveal how to fully leverage these powerful tools to enhance your website’s performance and user experience.
Event Type in GA4
In GA4, events are divided into four main categories:
- Automatically Collected Event
- Enhancement Measurement Event
- Recommended Event
- Custom Event
#1 Automatically Collected Event
GA4 automatically tracks some basic events. You can see a list of these automatically tracked events. If the event you want to track is included in this list, you don’t need to set up anything.
#2 Enhancement Measurement Event
In my GA4 tutorial article, I have mentioned how to enable Enhancement Measurement Event Tracking. I won’t repeat that here. In short, when Enhancement Measurement Tracking is enabled, GA4 automatically tracks the following events:
- Scroll (event name: scroll)
- Outbound link click (event name: click with the parameter outbound: true)
- Site search (event name: view_search_results)
- Youtube Video Engagement (events: video_start, video_progress, video_complete)
- File Download (event name: file_download)
- Page view (event name: page_view)
#3 Recommended Event
You can also set up events for tracking and data analysis based on different industries. Google provides recommended events specific to various industries.
#4 Custom Event
If the event you want to track is not mentioned in Automatically Collected Events, Enhancement Measurement Events, or Recommended Events, you can create a Custom Event.
Speaking of custom event tracking, let’s consider a common example in Hong Kong: tracking when a visitor clicks on the WhatsApp button to start a conversation directly with me on WhatsApp.
For instance, let’s take this website as an example: taklunc102.sg-host.com
![]()
When you click on “Event Tracking 教學”, you will be redirected to the following URL.
![]() https://api.whatsapp.com/send?phone=85260836213
https://api.whatsapp.com/send?phone=85260836213
If you want to track this event, you need to set up your Google Tag Manager (if you’re not familiar with Google Tag Manager, you can read my GTM Fundamentals to understand some basic concepts).
There are countless ways to create custom events, and the following is just one example.
Tracking Whatsapp Button Click
Following the GTM Fundamentals, first, create a Google Tag Manager account. You should see a screen similar to the one described.
![]()
Before creating your first Tag, you need to enable Built-in Variables in GTM. You must click on “Variables” on the left side, then press “Configure”.
![]() Scroll Down, Select All Clicks Elements
Scroll Down, Select All Clicks Elements
![]()
Return to the Dashboard again, select “Tags” from the left-side menu, and then click “New” on the next screen. To create your first Tag, you need to name it in the field at the top of the screen
![]()
After naming the Tag, click on the first box to choose the Tag Type. Then, select Google Analytics from the pop-up window on the right, followed by choosing Google Analytics: GA4 Event.
![]()
Please enter your Measurement ID in the Measurement ID field (refer to the GA4 Guide to know where to find it). The event name is customizable; in this case, I set it as “Whatsapp_Click”. After setting it up, click Save in the top right corner.
![]()
Then Add Trigger
![]()
Click the “+” button in the top right corner.
![]()
Rename it to “Whatsapp_Click” (you can name it whatever you like, as long as you can recognize it), then click on the pencil icon in the top right corner.
![]()
Select “Just Links”
![]()
Select “Some Link Clicks” and set the filter to Page URL contains “85260836213” (why this number? Because according to the example I gave you earlier, when you click to contact us via WhatsApp for a free quote, you are directed to the following URL: https://api.whatsapp.com/send?phone=85260836213. The unique part of this link, compared to other links, is this phone number. Therefore, we use this condition to set up the event. Finally, click Save.
![]()
Click “Preview” in the top right corner.
![]()
Enter your website URL. Please ensure that your website has successfully installed the relevant GTM Code.
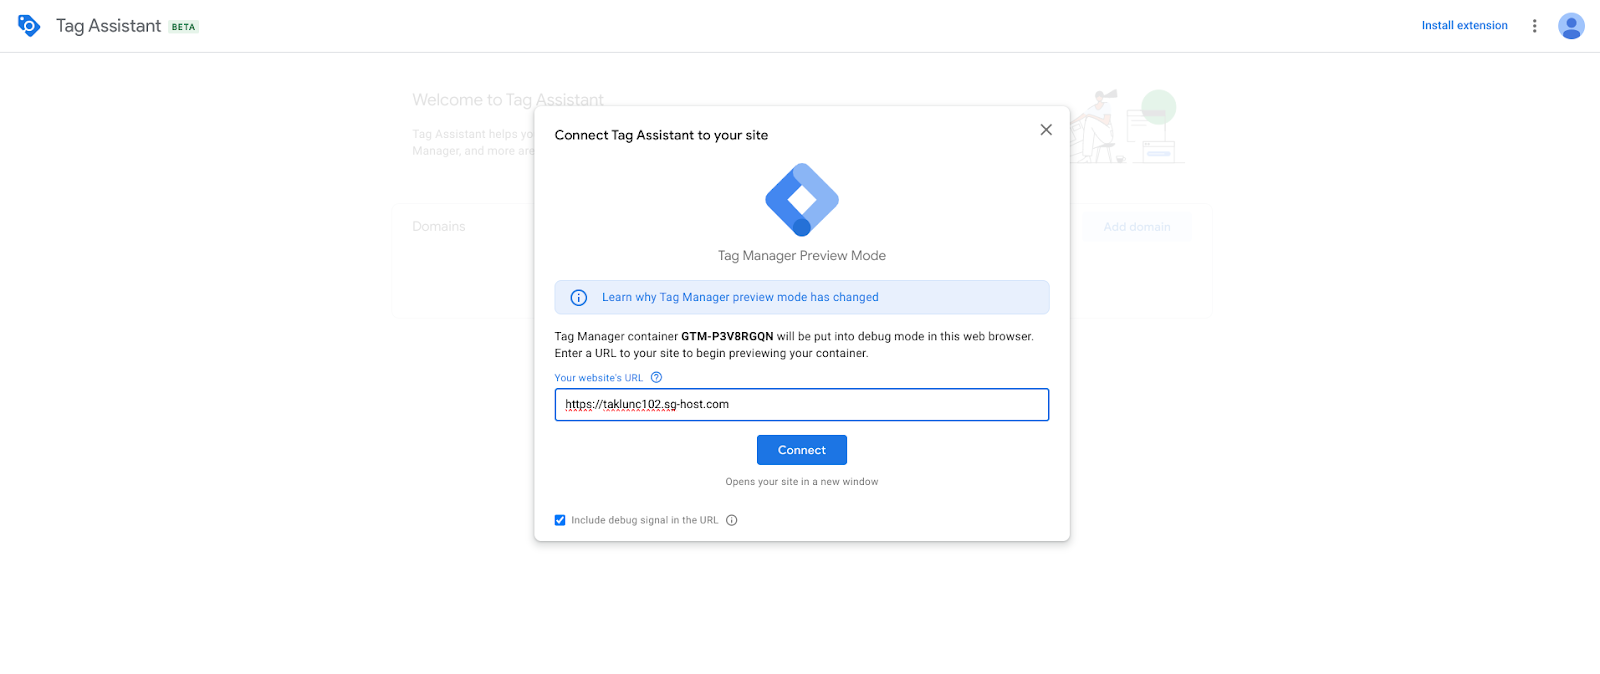
Your website will appear, and you should look for “Tag Assistant Connected” in the bottom right corner. If you see it, you have successfully entered Preview Mode. Click on “Event Tracking Tutorial” again.
![]()
Check your Tag Assistant, if you see “Whatsapp_Click” under “Tag Fired,” you have successfully created that event.
![]()
Don’t forget to click “Submit” in Google Tag Manager; this is when the event setup is officially published!
![]()


